
Open Course › Course 2 › Module 5 · Recording environmental sounds
Module 5 · Recording environmental sounds
Thematic module 3: Collecting and managing environmental sounds in the archive
Module goals. By the end of this module you will be able to:
- choose the right equipment for different recording goals;
- apply good field recording techniques and settings;
- plan and carry out an on-site installation of autonomous recorders;
- record in an ethical and safe way.
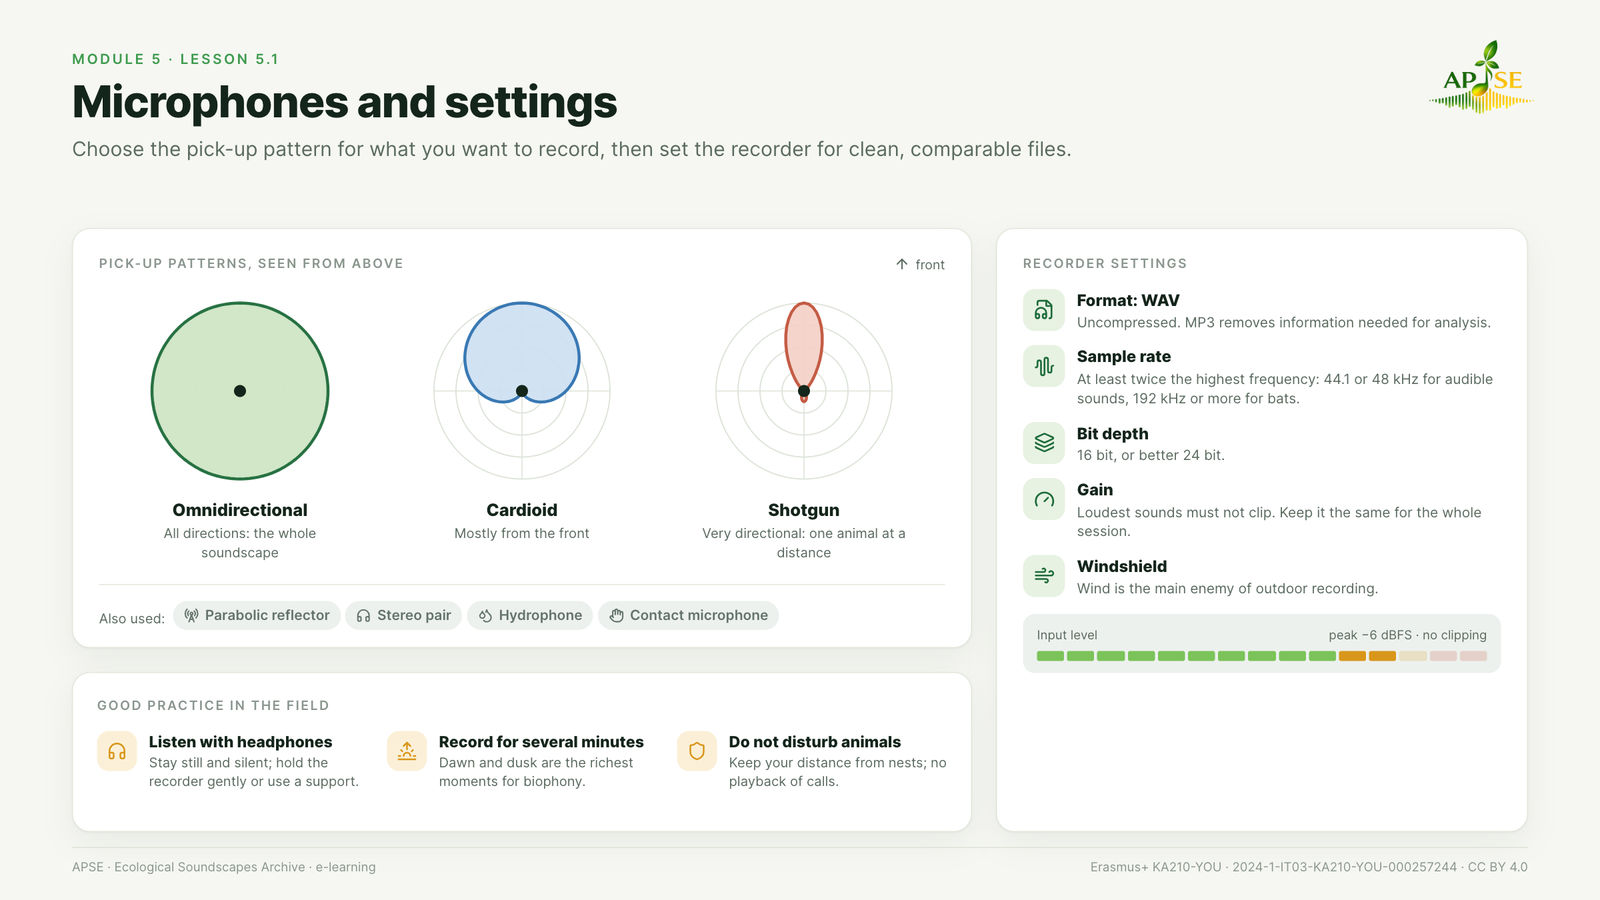
Figure 5.1. Microphones and settings. Pick-up patterns of common microphones, seen from above, and recommended settings.
Recorders. Environmental sounds can be recorded with:
- handheld digital recorders, with built-in or external microphones;
- smartphones, which are always at hand and are a good starting point, especially with a small external microphone;
- autonomous recorders, which are left in the field and record on a schedule (lesson 5.2).
Microphones.
- Omnidirectional: pick up sound from all directions; good for recording the whole soundscape.
- Cardioid: more sensitive to sounds in front of the microphone.
- Shotgun: very directional; good for a single animal at a distance.
- Parabolic reflector: a dish that concentrates distant sounds from one direction; often used for birdsong.
- Stereo pairs: two microphones that give an immersive sense of space.
- Hydrophones: for sounds under water (fish, insects, amphibians, streams).
- Contact microphones: pick up vibrations in wood, plants and the ground.
Settings.
- Format: record in WAV (uncompressed). Compressed formats such as MP3 remove information that is needed for analysis.
- Sample rate: it must be at least twice the highest frequency you want to record. 44.1 or 48 kHz are enough for sounds we can hear (up to about 20 kHz); bats and other ultrasonic sounds need much higher sample rates (192 kHz or more).
- Bit depth: 16 bits or, better, 24 bits.
- Gain (input level): set it so that the loudest sounds do not distort (“clip”). Keep it the same during a session so that recordings can be compared.
Technique.
- Use a windshield: wind is the main enemy of outdoor recording.
- Stay still and silent, hold the recorder gently or place it on a support, and listen with headphones.
- Record for several minutes: a soundscape needs time to reveal itself.
- At the start, say or write down place, date, time and conditions, then let the place speak.
- Dawn and dusk are the richest moments for biophony.
Ethics and safety.
- Do not disturb animals: keep your distance from nests and dens and do not use playback of calls, especially in the breeding season, unless it is part of an authorised study.
- Respect the rules of protected areas and private property.
- Avoid recording conversations of people who can be identified.
- Check the weather, tell someone where you are going and, with groups, never leave anyone alone in the field.
Watch: How To Record Audio: The Basics (Cornell Lab of Ornithology, YouTube). Third-party video embedded from YouTube; it is not covered by the course licence (CC BY 4.0).


Funded by the European Union. Views and opinions expressed are however those of the author(s) only and do not necessarily reflect those of the European Union or the Agenzia Italiana per la Gioventù. Neither the European Union nor the granting authority can be held responsible for them.
APSE · Erasmus+ KA210-YOU · 2024-1-IT03-KA210-YOU-000257244 · Licence CC BY 4.0 · Free and open: no registration needed.
